Introduction
In a world where personalization reigns supreme, tumbler customization stands out as a creative outlet that allows individuals to express their unique style while crafting functional art. Whether it’s for a gift, a promotional item, or simply a way to enjoy beverages in a more personal manner, the journey of transforming a plain tumbler into a one-of-a-kind masterpiece is both rewarding and fun.
From gathering essential materials and tools to applying intricate designs and personal touches, this guide will walk through the steps necessary to elevate drinkware to new heights.
With the tumbler customization market booming, now is the perfect time to dive into this engaging craft and discover how to make tumblers that not only serve a purpose but also tell a story.
Essential Materials and Tools for Tumbler Customization
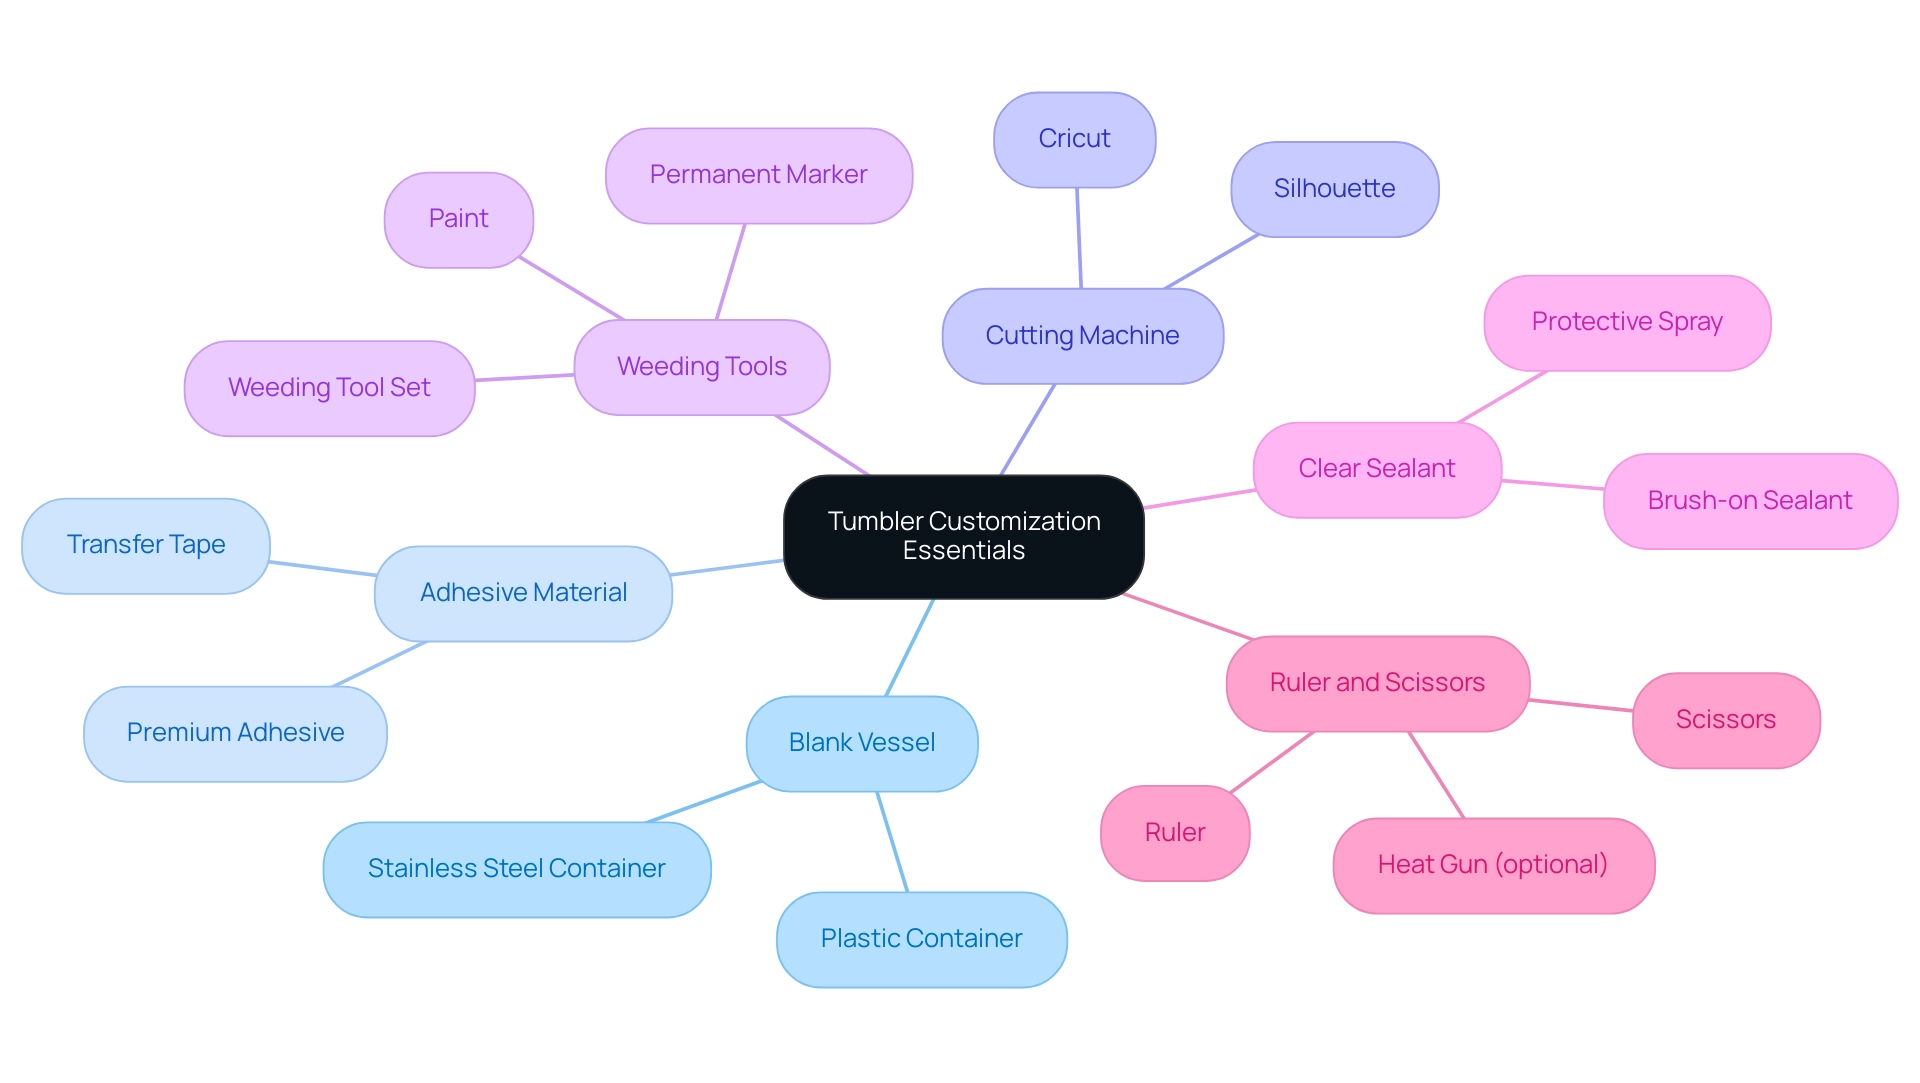
To explore the realm of customization for drinkware, you'll want to gather a few key materials and tools to unlock your creative potential and elevate your beverage containers with our custom laser engraved insulated options:
- Blank Vessel: Start with a clean, dry stainless steel or plastic container that you can customize tumbler, perfect for showcasing your unique style. Our tumblers feature high-quality stainless steel construction, ensuring durability and excellent temperature retention for both hot and cold beverages.
- Adhesive Material: Select premium adhesive material in bright hues to enhance your customized creations and lettering.
- Transfer Tape: This useful tool guarantees your graphics apply seamlessly and perfectly aligned, creating a sophisticated appearance.
- Cutting Machine: A Cricut or Silhouette device is ideal for cutting out elaborate patterns that will make your container stand out in the crowded market.
- Weeding Tools: These essential tools assist you in removing any excess vinyl, allowing your stunning creations to shine.
- Permanent Marker or Paint: Use these to add personal touches, messages, or drawings right onto the tumbler, making it truly yours.
- Clear Sealant: A protective spray or brush-on sealant will keep your designs looking fresh and guard against wear and tear, ensuring durability.
- Ruler and Scissors: Accurate measurements and cuts are vital, making these tools essential for any alteration project.
- Heat Gun (optional): If you want to achieve a smooth finish, a heat gun can help eliminate any pesky bubbles in your vinyl application.
With the drinkware personalization market in the MEA region valued at 0.49 USD Billion and projected to reach 0.7 USD Billion, this presents a lucrative opportunity for creative expression and personalized gifts. As you begin your personalization journey, remember the competitive landscape characterized by key players like Tervis, YETI, Hydro Flask, and CamelBak. Utilizing high-quality materials and tools will not only help you stand out but also allow you to customize tumbler gifts that will be cherished for years to come.
Additionally, you can customize tumbler by ordering your custom engraved insulated cup quickly and easily: simply select your desired style and size, choose your design or provide your artwork, and let our skilled team handle the rest. Staying informed about trends and consumer preferences is crucial for success in customization.
Step-by-Step Guide to Customizing Your Tumbler
Personalizing your container is not just an exciting way to express your creativity; it’s also a strategic move to showcase your brand in a lucrative market valued at around USD 3.1 Billion in 2024. By following these engaging steps, you can customize tumbler into a unique masterpiece that resonates with your audience.
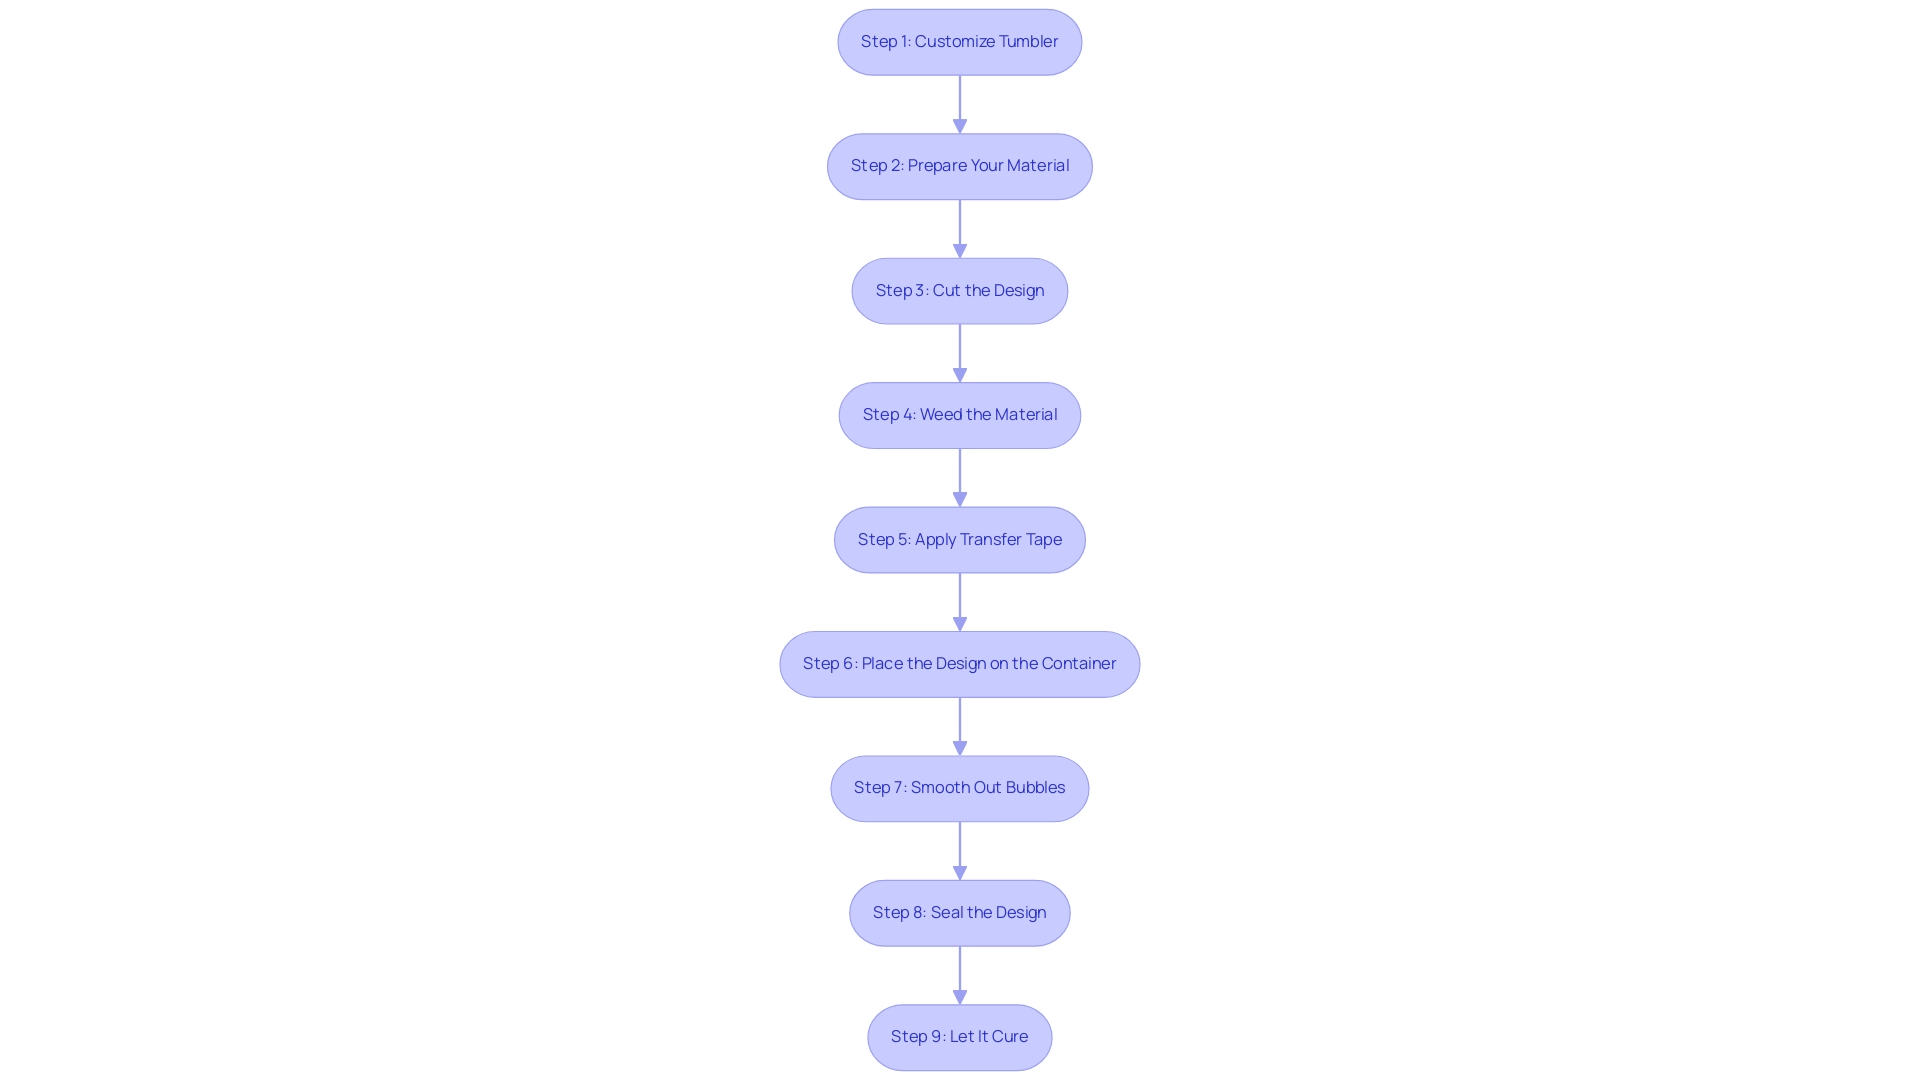
Customize Tumbler: Start by utilizing software to create your ideal design.
- Consider incorporating eye-catching patterns, meaningful quotes, or images that reflect your brand values.
- Ensure your layout is optimized for the substrate to achieve the best printing results.
Prepare Your Material: Load high-quality adhesive film into your cutting machine.
-
If your design includes text, remember to mirror it before cutting to ensure it reads correctly on your tumbler.
-
Cut the Design: Initiate the cutting process. Once finished, gently take off the material from the cutting mat, being cautious not to harm your design.
Weed the Material: Using weeding tools, meticulously remove any excess material, leaving only the elements you wish to embellish your container. This step is crucial to customize tumbler for achieving a polished finish.
Apply Transfer Tape: Cut a piece of transfer tape to size and lay it over your design, smoothing it down firmly for a secure stick that will make transferring easier.
-
Place the Design on the Container: Carefully peel away the backing from the adhesive material and position it on your container. Use a ruler for precise alignment if needed.
-
Smooth Out Bubbles: Utilize a scraper tool or a credit card to eliminate any bubbles, ensuring a solid bond between the vinyl and the surface of the container.
Seal the Design: Protect your creation by spraying or brushing on a clear sealant, shielding it from wear and tear. Consider using protective coatings that enhance durability and resistance to scratches and fading.
-
Let It Cure: Patience is key!
-
Allow the sealant to dry entirely following the product instructions before using your newly customized container.
By adhering to these steps, you'll produce not only a beautifully customized tumbler but also a personal piece that effectively functions as a promotional object. Customized drinkware, due to their daily utility and long-term brand exposure, can significantly enhance visibility and recognition. Customized containers create a positive association between the business and the recipient while fitting various marketing budgets.
Additionally, considering regional market revenue forecasts can provide broader context for the importance of customization, appealing to marketing managers eager to maximize their brand's reach. Furthermore, the speed and efficiency in production, such as fast curing times, ensure that your promotional items can be delivered promptly, making them ideal for time-sensitive marketing campaigns. Don't forget that other promotional items, like pens and keychains, can also be customized in a similar fashion, broadening your branding efforts.
Adding Personal Touches with Paint and Markers
Once your artwork is in position, it’s time to enhance your cup with some distinctive personal touches using paint or permanent markers. Here’s how to get started:
-
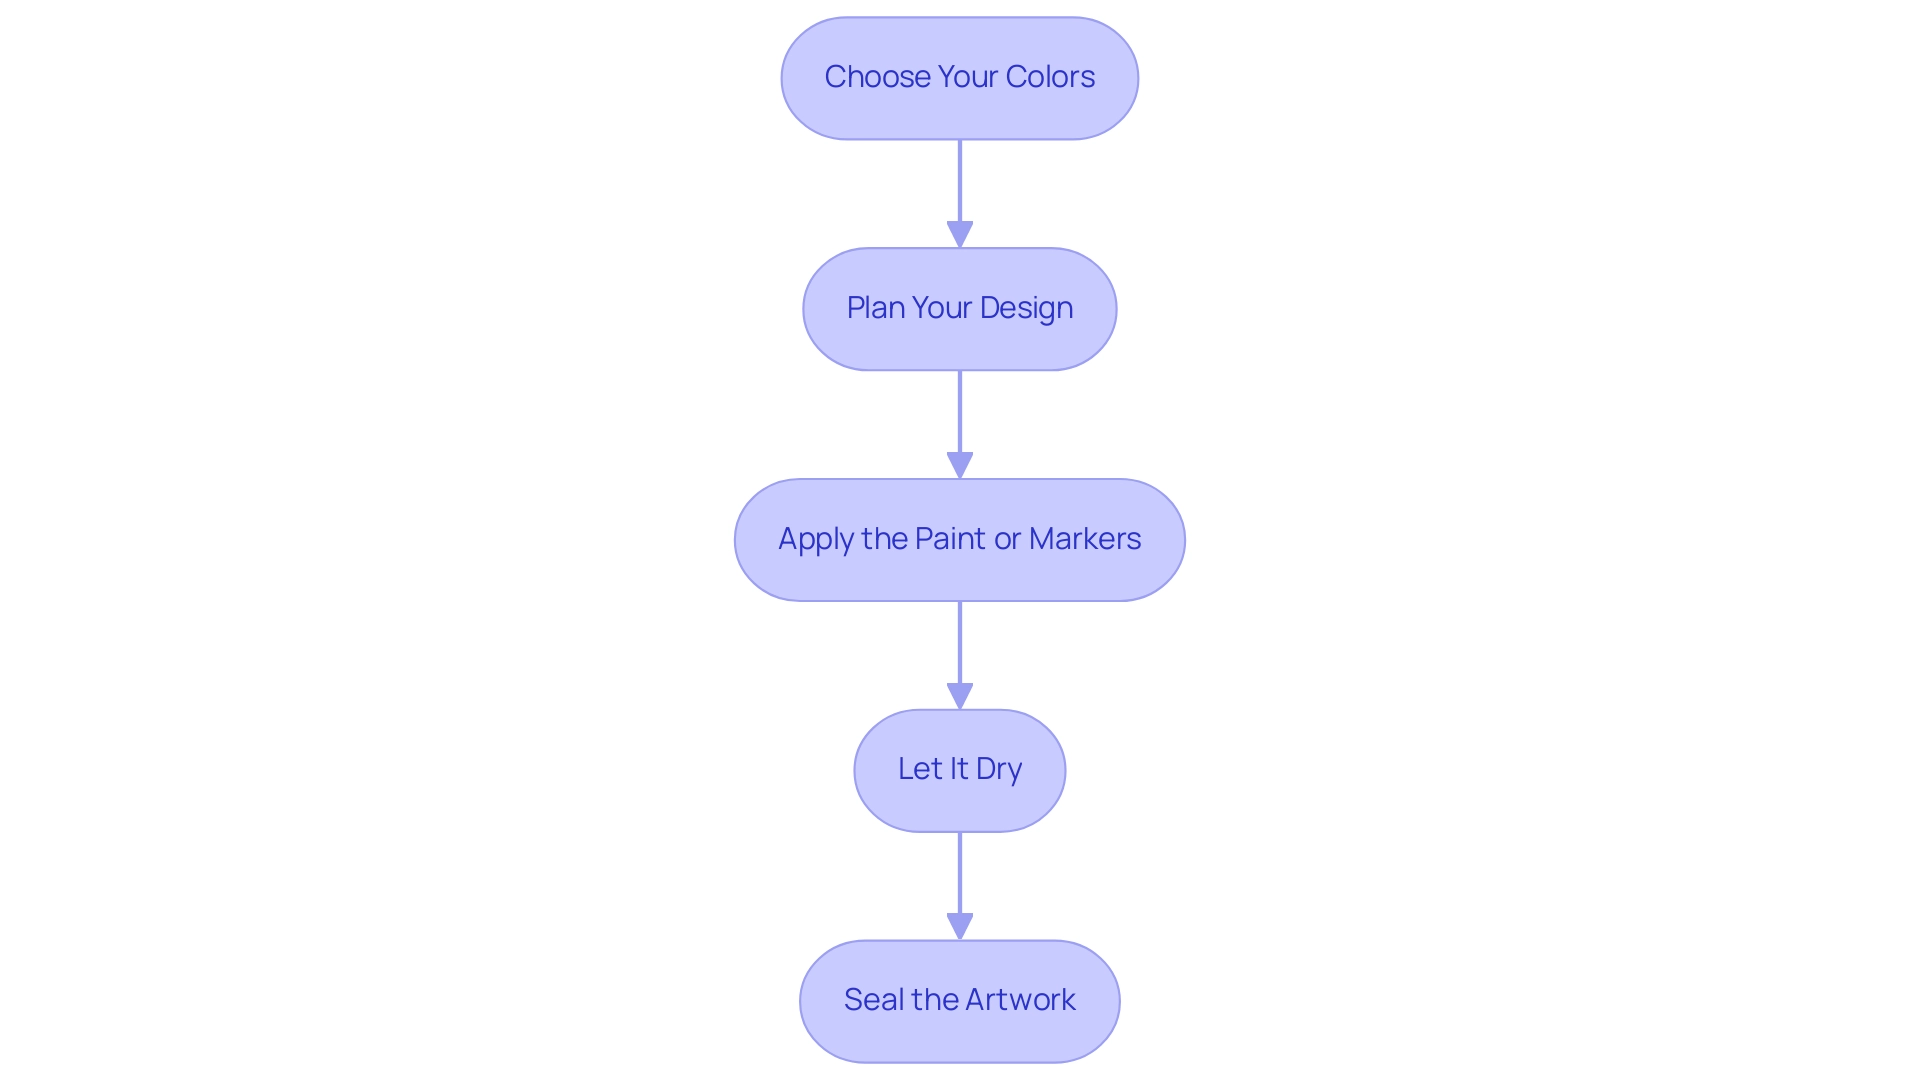
Choose Your Colors: Begin by selecting paint or markers that harmonize with your vinyl design.
Acrylic paints are perfect for drinkware, while permanent markers excel at delivering intricate and detailed designs. -
Plan Your Design: Before you dive in, sketch your ideas on paper. This step is crucial as it allows you to visualize the final appearance of your container, making the process smoother and more enjoyable.
-
Apply the Paint or Markers: With your design in mind, carefully add your chosen colors to the container. Be mindful to avoid smudging the vinyl; using fine-tipped brushes or markers can help you achieve those delicate details you envision.
-
Let It Dry: Patience is key!
Allow your paint or ink to dry completely before touching your container. This prevents any unsightly smudges and ensures that your artwork remains pristine. -
Seal the Artwork: Once everything is dry, apply a clear sealant to protect your masterpiece from everyday wear and tear.
This final touch not only maintains your creations but also adds a polished appearance.
By incorporating these personal elements, you can customize your tumbler into a unique item that showcases your personality and serves as a meaningful gift, ideal for any event. With a set of 7 acrylic paint pens included in your kit, the possibilities for customization are endless! Moreover, as consumer preferences change in developing markets such as India and Brazil, it is crucial to remain ahead of the trends affecting cup styles for 2024.
Embrace creativity and let your cup stand out!
Troubleshooting Common Customization Issues
The process to customize a tumbler can be a rewarding journey, but it often comes with its share of challenges. Let’s explore some common hurdles you might face and how to tackle them with ease:
-
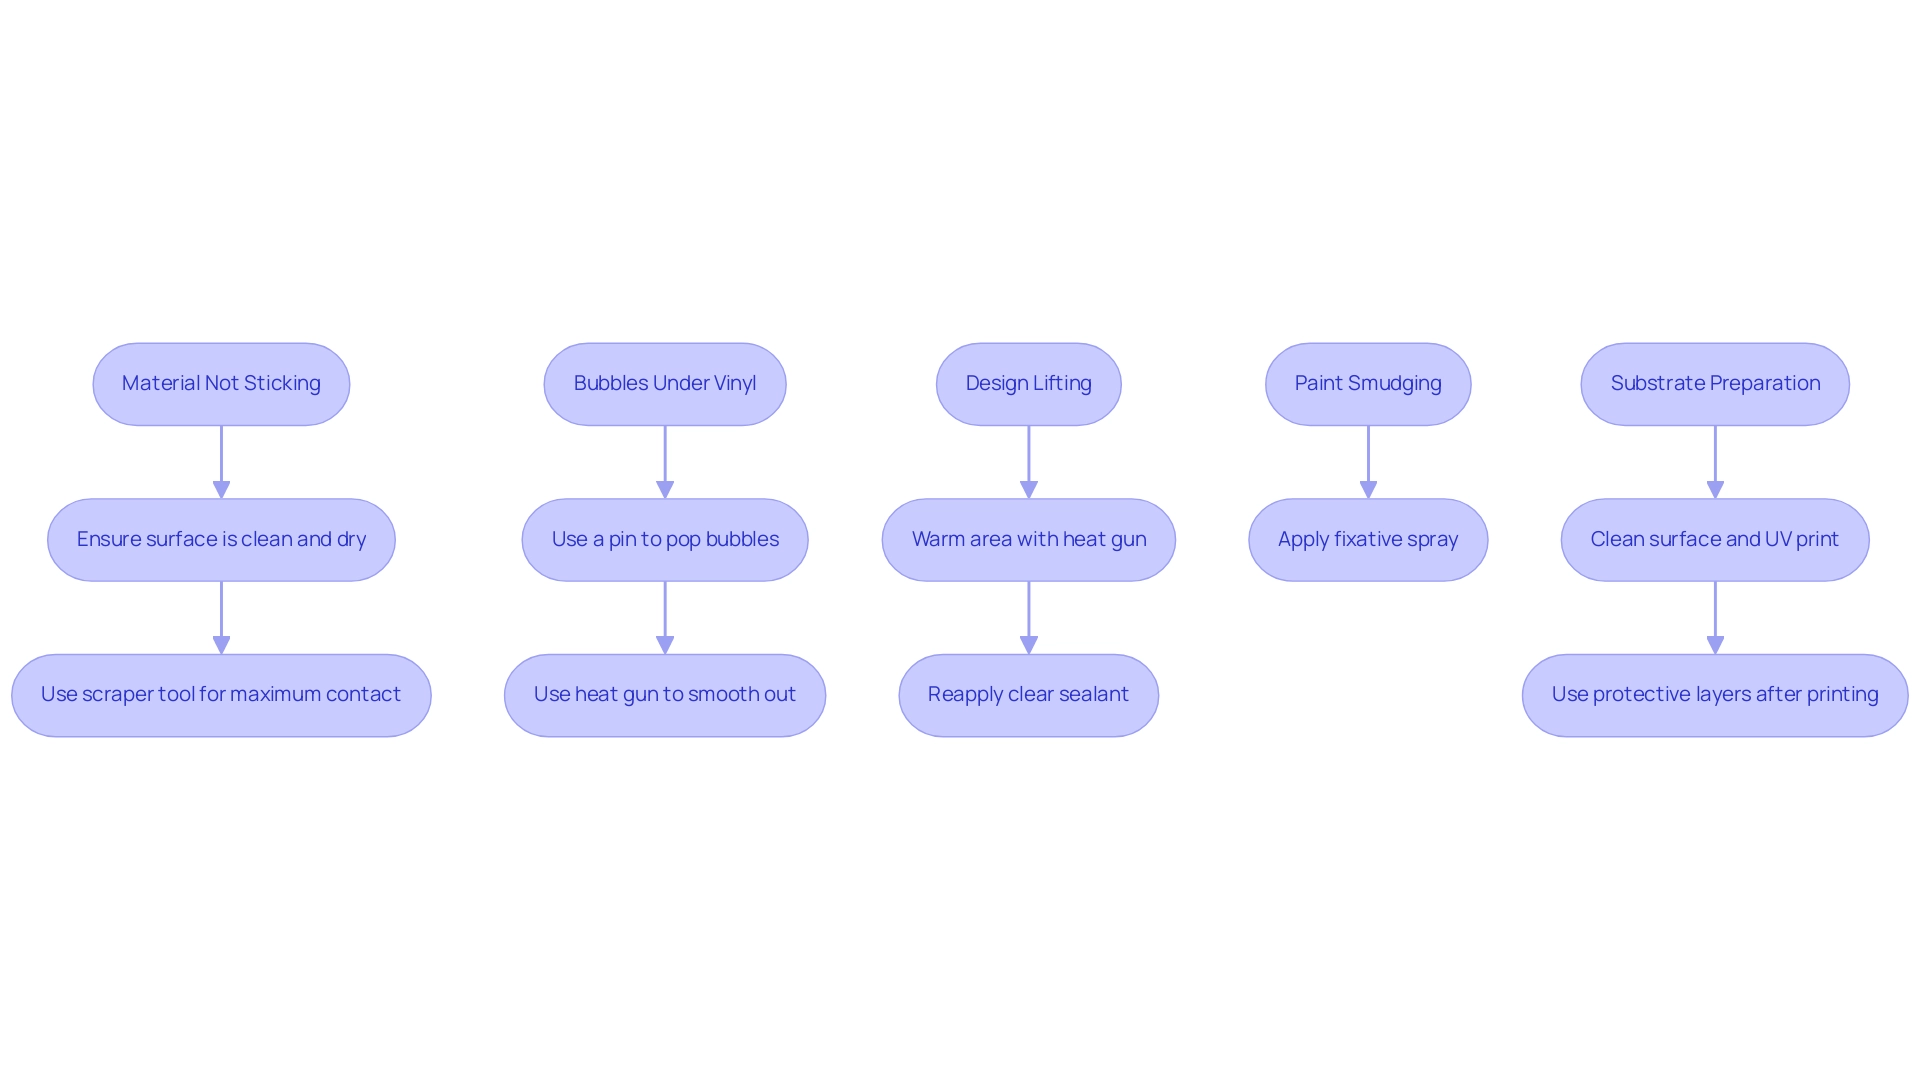
Material Not Sticking: If your design isn’t adhering as it should, the first step is to ensure the tumbler’s surface is clean and dry.
This is crucial; improper substrate preparation can lead to poor ink adhesion. A helpful tip is to use a scraper tool to press down firmly on the material, ensuring maximum contact. According to crafting professionals, one common issue is not properly preparing the surface, which can lead to adhesive problems. -
Bubbles Under Vinyl: Spotting bubbles? No need to panic! Simply use a pin to create a tiny hole in the bubble, then gently press out the trapped air.
If that doesn’t work, a heat gun can help warm the material slightly, allowing you to smooth it out effortlessly. Recent statistics indicate that nearly 25% of DIY enthusiasts encounter this issue, highlighting the importance of proper vinyl application techniques. -
Design Lifting: If you observe sections of your creation starting to lift, warm those areas with a heat gun and press down firmly to reattach.
For added security, consider reapplying a clear sealant to the edges for a more durable finish. A case study on demographic influences in tumbler demand shows that as personalization becomes more popular in emerging markets, understanding these technical challenges is crucial for capturing consumer interest. -
Paint Smudging: If your paint smudges, a fixative spray can be your best friend.
Apply it before sealing your design to lock in the paint and prevent any unwanted smearing. Expert advice suggests that using high-quality materials can significantly reduce the likelihood of such issues occurring. -
Substrate Preparation: Before starting the modification process, ensure that the substrate is properly prepared.
This involves cleaning the surface and placing the container into the UV printer, which is essential for achieving optimal ink adhesion. Furthermore, think about using protective layers after printing to improve longevity and appearance.
By foreseeing these typical challenges and equipping yourself with these useful strategies, you’ll guarantee a more seamless personalization process to customize a tumbler that you’ll be proud to display! Remember, understanding the broader market trends and consumer behavior can enhance your customization efforts, especially as demand grows in regions with increasing disposable income. And don’t forget, a clean substrate is the first step to achieving that perfect finish!
Showcasing Your Customized Tumbler
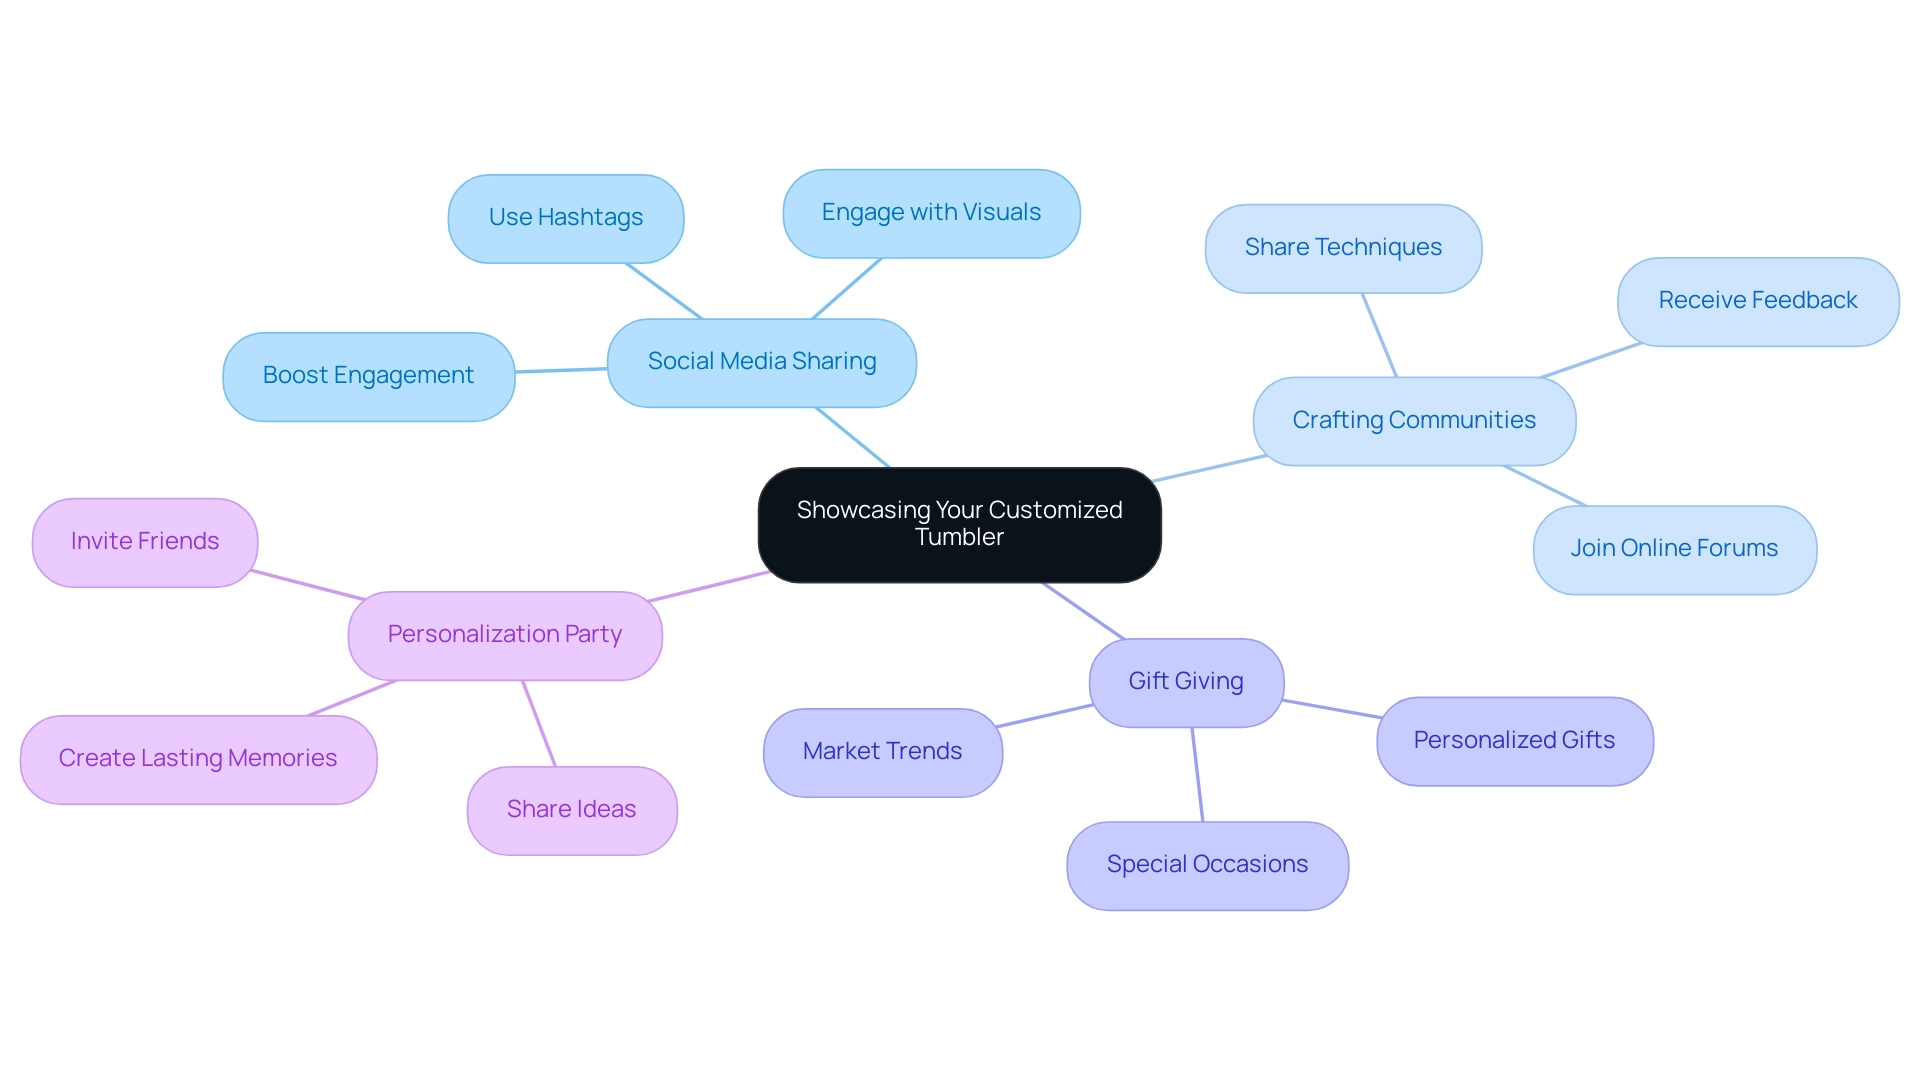
Now that your container is complete, it’s time to display it in style! Here are some creative ways to showcase your customized creation:
- Social Media Sharing: Capture striking photos of your container and post them on platforms like Instagram and Pinterest.
Don’t forget to include popular hashtags such as #TumblerCustomization and #CraftYourStyle to reach fellow enthusiasts and expand your audience. Engaging visuals can significantly enhance social media interaction, with studies indicating that posts featuring personalized items often see a boost in engagement. In fact, personalized recommendations can increase revenue by up to 26%, making it a smart strategy to showcase your unique designs.
- Crafting Communities: Dive into online crafting forums and groups dedicated to cup enthusiasts. These communities are treasure troves of inspiration, where you can share your work, receive feedback, and discover new techniques. Engaging with like-minded individuals not only fosters connection but also enhances your skills and creativity.
Given that the Buy Guide's following is predominantly women aged 35 to 44, consider tailoring your engagement strategies to resonate with this demographic.
- Gift Giving: Consider giving your personalized drink container to friends or family. Personalized gifts hold a special place in recipients’ hearts, making them a cherished keepsake.
Whether it’s a birthday or a simple gesture of appreciation, your container can become a meaningful present that showcases your thoughtfulness. Understanding market trends, as emphasized by ORACLE, can help you position your product as a desirable gift choice.
- Host a Personalization Party: Gather your friends for a fun-filled personalization party!
Invite them over for a crafting session where everyone can design their own containers. This shared experience not only strengthens bonds but also sparks creativity and collaboration. By sharing ideas and techniques, you’ll inspire each other and make lasting memories. By showcasing your creations, you not only celebrate your creativity but also inspire others to explore how to customize tumbler.
Your unique designs can motivate fellow enthusiasts to explore their artistic side, building a vibrant community around this engaging craft!
Conclusion
Creating customized tumblers is not just a craft; it's an opportunity to express individuality and creativity while making practical items that tell a story. Throughout this guide, essential materials and tools have been highlighted, from high-quality tumblers to vibrant adhesive vinyl, ensuring that anyone can start their customization journey equipped for success.
The step-by-step process outlined empowers individuals to transform their visions into reality, turning plain drinkware into unique masterpieces. By incorporating personal touches with paint and markers, each tumbler can truly reflect the personality of its creator, making it a thoughtful gift or an engaging promotional item.
Addressing common challenges in customization reinforces the importance of preparation and technique, ensuring that the journey remains enjoyable. Finally, showcasing these creations through social media or community engagement not only celebrates personal achievements but also inspires others to embark on their own customization adventures.
In a world that values uniqueness, tumbler customization stands as a vibrant avenue for self-expression and connection. Now is the time to embrace this craft, unleash creativity, and share those one-of-a-kind designs with the world.


