Introduction
In a world where individuality reigns supreme, customizing caps offers a unique avenue for self-expression and creativity. Whether it's a bold statement piece or a subtle nod to personal style, the journey of crafting a custom cap is both thrilling and rewarding.
From selecting the right materials to exploring innovative design options, enthusiasts can transform a simple blank cap into a canvas that reflects their personality. This guide delves into essential tools, step-by-step processes, and the latest trends in cap customization, ensuring that anyone can create a standout accessory that not only looks great but stands the test of time.
Get ready to dive into the vibrant world of custom headwear, where imagination knows no bounds!
Essential Materials and Tools for Custom Cap Creation
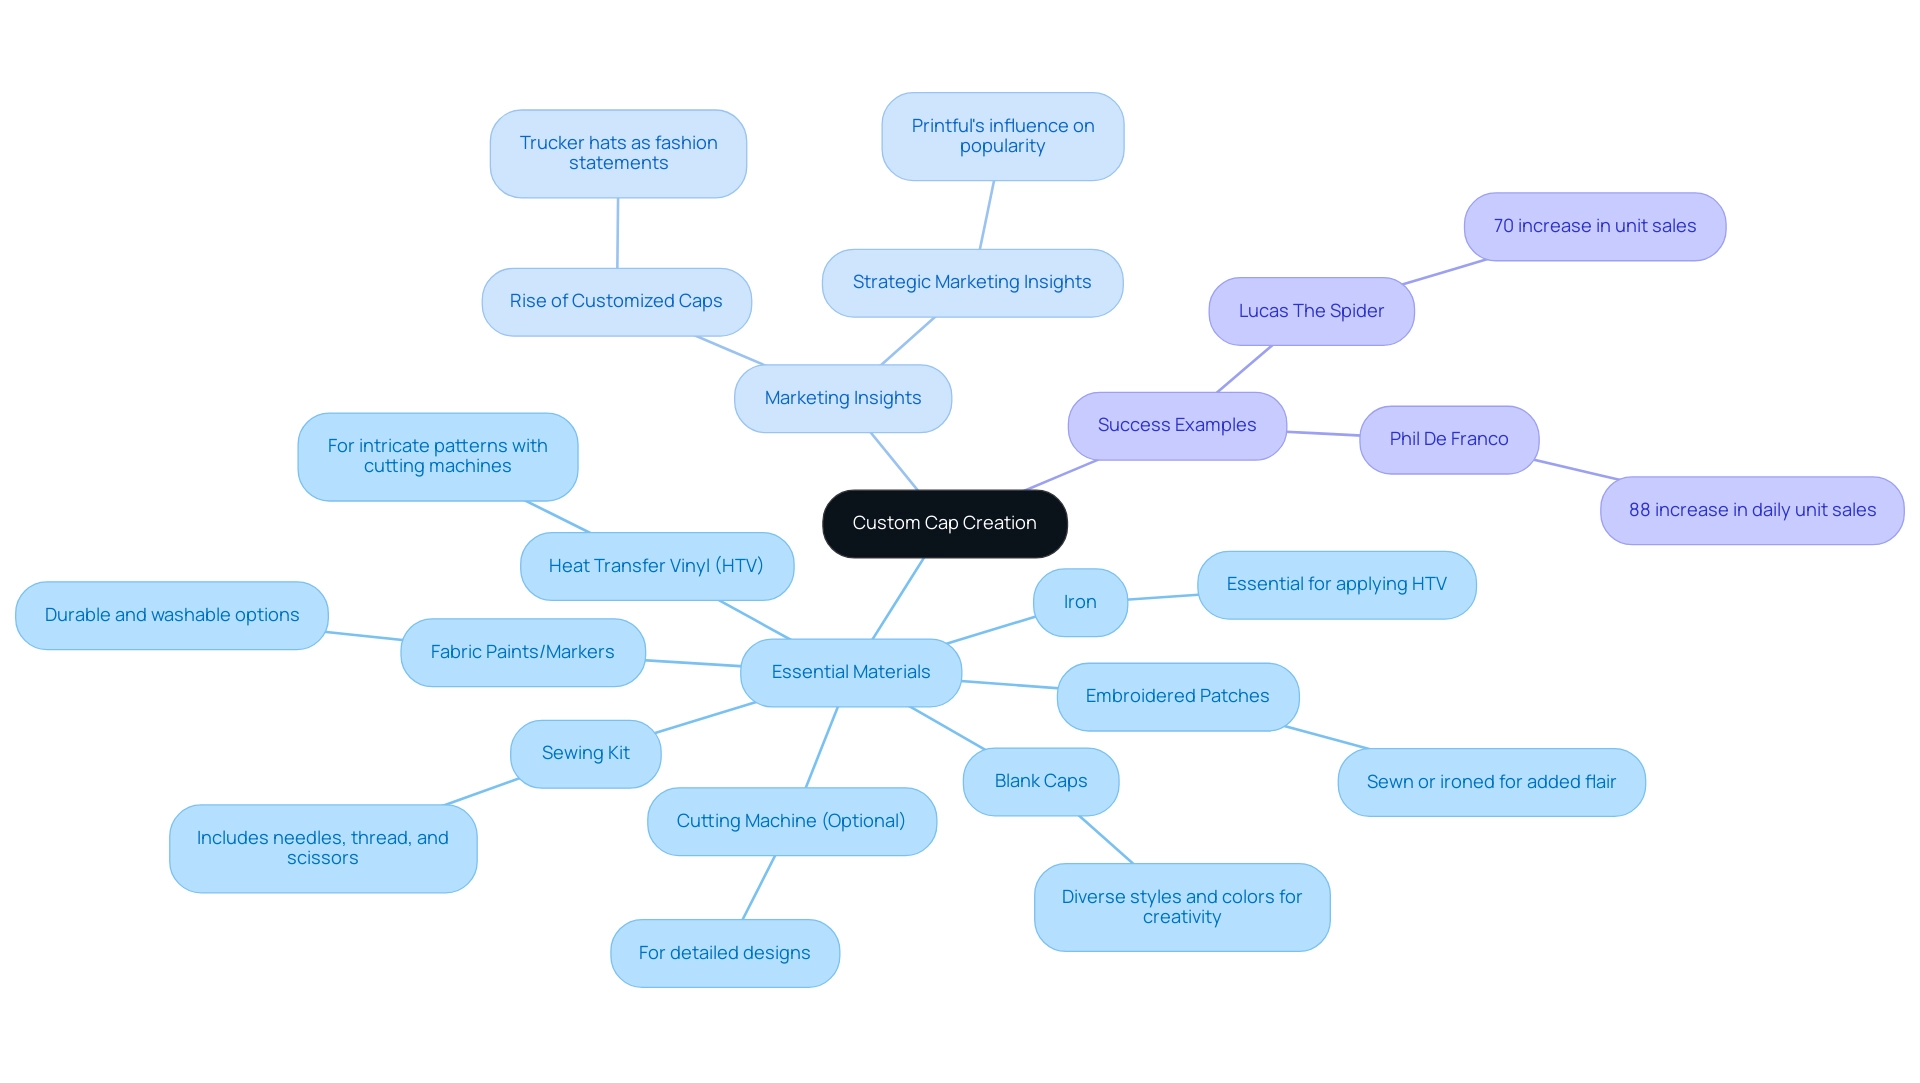
Creating your own personalized headwear, such as customized caps, can be an exciting and fulfilling project! To get started, here are the essential materials and tools you'll need:
-
Blank Caps: Begin by selecting a diverse range of blank caps—think baseball caps, snapbacks, and more—in various colors and styles to match your unique creative vision.
-
Fabric Paints or Markers: To add your personal touch, choose durable fabric paints or markers that are both vibrant and washable. This method will ensure your creations endure through wear and washing.
-
Embroidered Patches: For those who adore the classic embroidered look, consider sourcing patches that can be easily sewn or ironed onto your caps. They add an instant flair!
-
Heat Transfer Vinyl (HTV): If you're keen on intricate patterns, HTV is a fantastic option. Perfect for use with a cutting machine, it allows you to create detailed graphics that are easily applied with heat.
-
Sewing Kit: A basic sewing kit—complete with needles, thread, and scissors—is invaluable for attaching patches or adding embellishments to your caps.
-
Iron: Don’t forget an iron! It’s essential for applying HTV effectively and for smoothing out any wrinkles in the fabric before you start personalizing.
-
Cutting Machine (Optional): If you aim to create intricate patterns that truly stand out, a cutting machine like a Cricut can be a game-changer. It effortlessly cuts out your creations from HTV or vinyl.
In addition to these materials, if you're considering bulk orders, remember that you can get free digitization for all your file assets with a minimum order of 25 embroidered items, which can significantly enhance your production efficiency.
The rise of customized caps is also supported by strategic marketing insights. According to Printful, this marketing strategy has transformed trucker hats into customized caps that are no longer simple giveaway items but are now fashion statements favored by many. Moreover, the effectiveness of promotional strategies featuring customized caps is evident in the case study of the YouTube Merch Shelf, where early adopters experienced substantial increases in merchandise sales.
For instance, Lucas The Spider saw a 70% increase in unit sales, demonstrating the potential success of well-executed customized caps projects. With these materials at hand and insights into the market trends, you’re well on your way to crafting stunning customized caps that reflect your personality and style while leveraging the latest strategies for success!
Exploring Design Options for Your Customized Caps
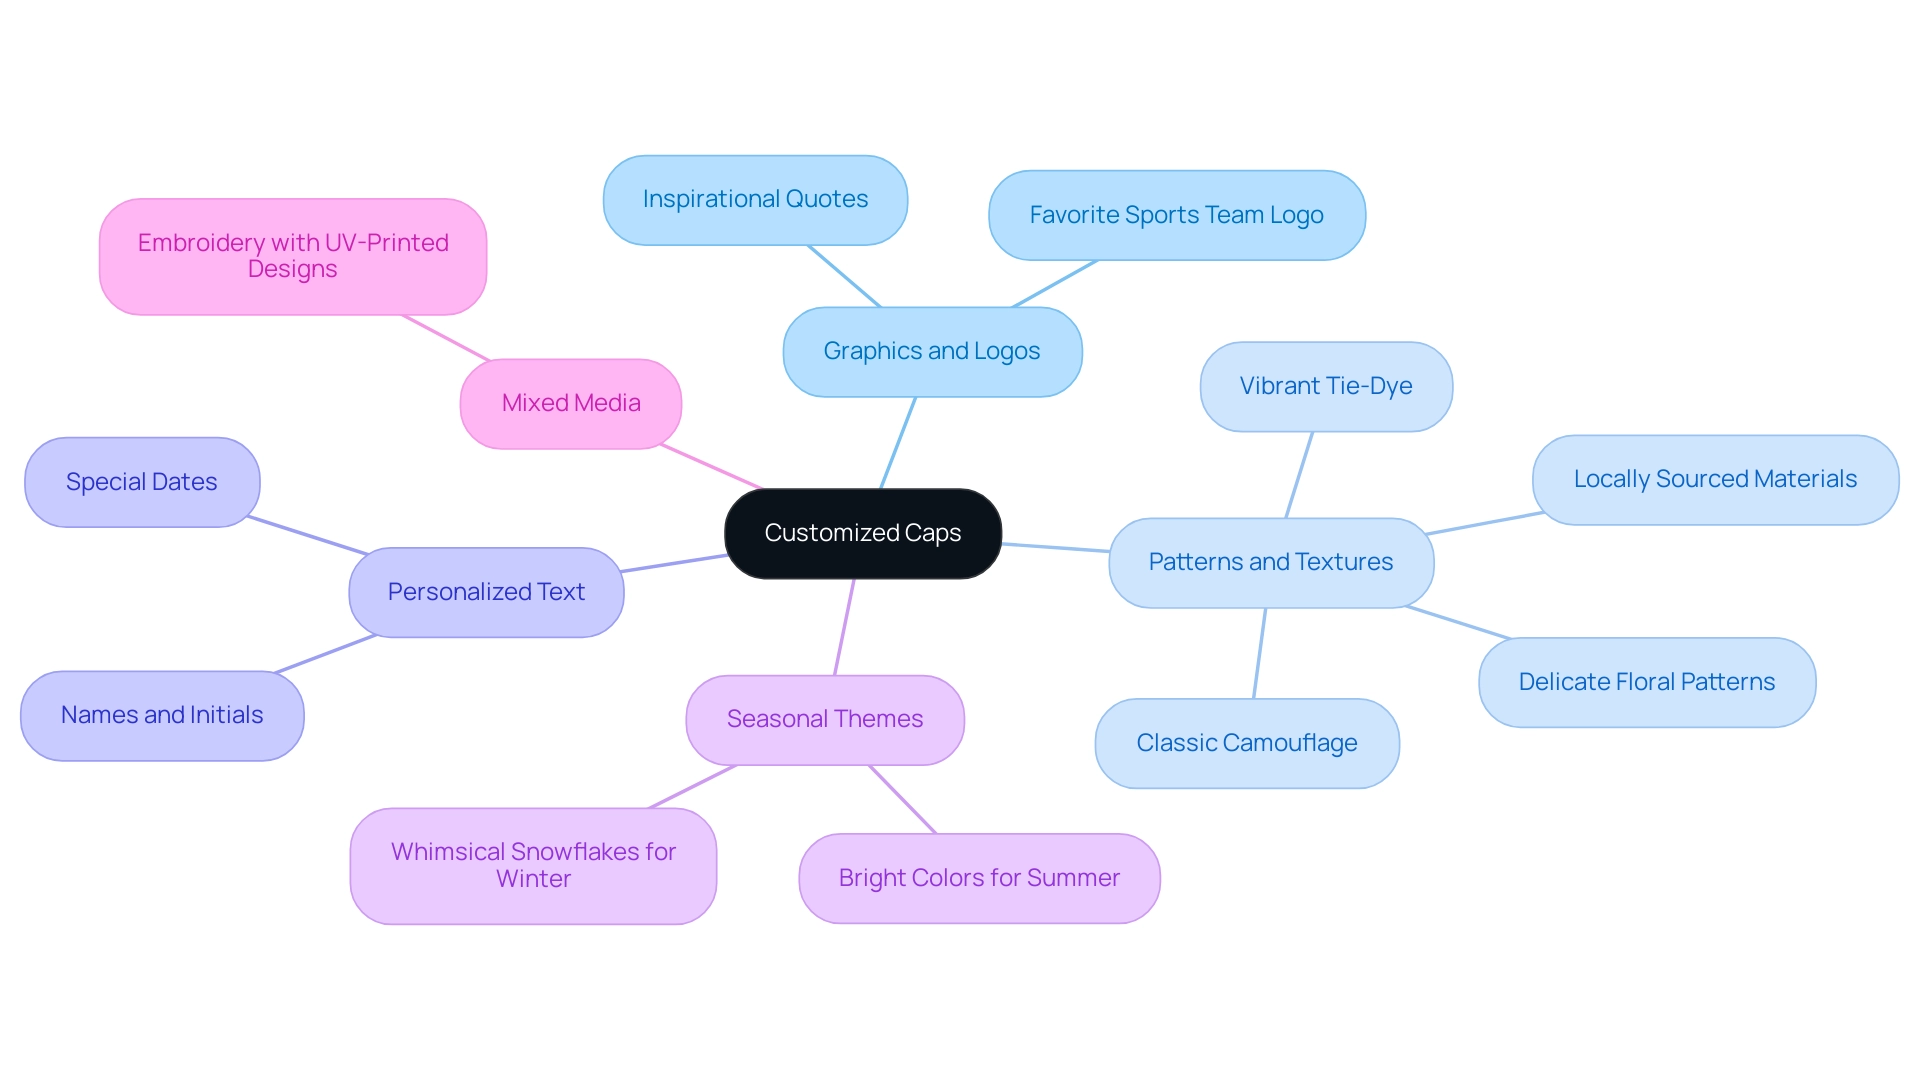
The realm of customized caps presents virtually limitless creative possibilities, providing an exciting chance to showcase your unique style while considering sustainability. With advancements in UV technology, you can achieve vibrant, personalized designs that are not only eye-catching but also environmentally friendly. Here are some popular ideas to inspire your creativity:
-
Graphics and Logos: Infuse your caps with personality by incorporating your favorite graphics, logos, or symbols. Whether it’s your beloved sports team logo or an inspiring quote, this is a fantastic way to express what you love while promoting your brand. UV printing allows for high-quality, detailed graphics on customized caps that stand out.
-
Patterns and Textures: Why not experiment with patterned fabrics or textured materials? From vibrant tie-dye to classic camouflage or delicate floral patterns, these can add an eye-catching flair to your caps. Additionally, using locally sourced materials and natural dyes not only enhances your creation but also minimizes your carbon footprint, aligning your creative vision with sustainable practices.
-
Personalized Text: Make your cap truly one-of-a-kind by adding your name, initials, or a special date. Techniques like fabric paint or embroidery can enhance your design, but UV methods offer a seamless way to incorporate text with precision, making each piece unique.
-
Seasonal Themes: Reflect the spirit of the seasons or upcoming holidays with themed caps. Bright colors for summer vibes or whimsical snowflakes for winter can capture the essence of each time of year, allowing for a fresh look with customized caps throughout the seasons. UV printing can easily adapt to seasonal trends with quick turnaround times.
-
Mixed Media: Combine various artistic techniques for a multi-dimensional masterpiece. Imagine pairing embroidery with UV-printed designs—this creates a textural contrast that stands out and showcases your creativity.
Before diving into production, take a moment to brainstorm and sketch out your ideas. This not only helps visualize your concept but also ensures a cohesive appearance that truly represents you.
As we move into 2024, there's a noticeable shift away from over-the-top embellishments toward tasteful, well-considered details. Remember, as WGSN describes, the color palettes for 2024 are 'full of hope and positivity,' drawing inspiration from the beauty found in nature. So, let your creativity flow and create a cap that reflects your individuality while also embracing contemporary trends and sustainable practices, all made possible through the innovative UV printing technology!
Step-by-Step Guide to Customizing Your Caps
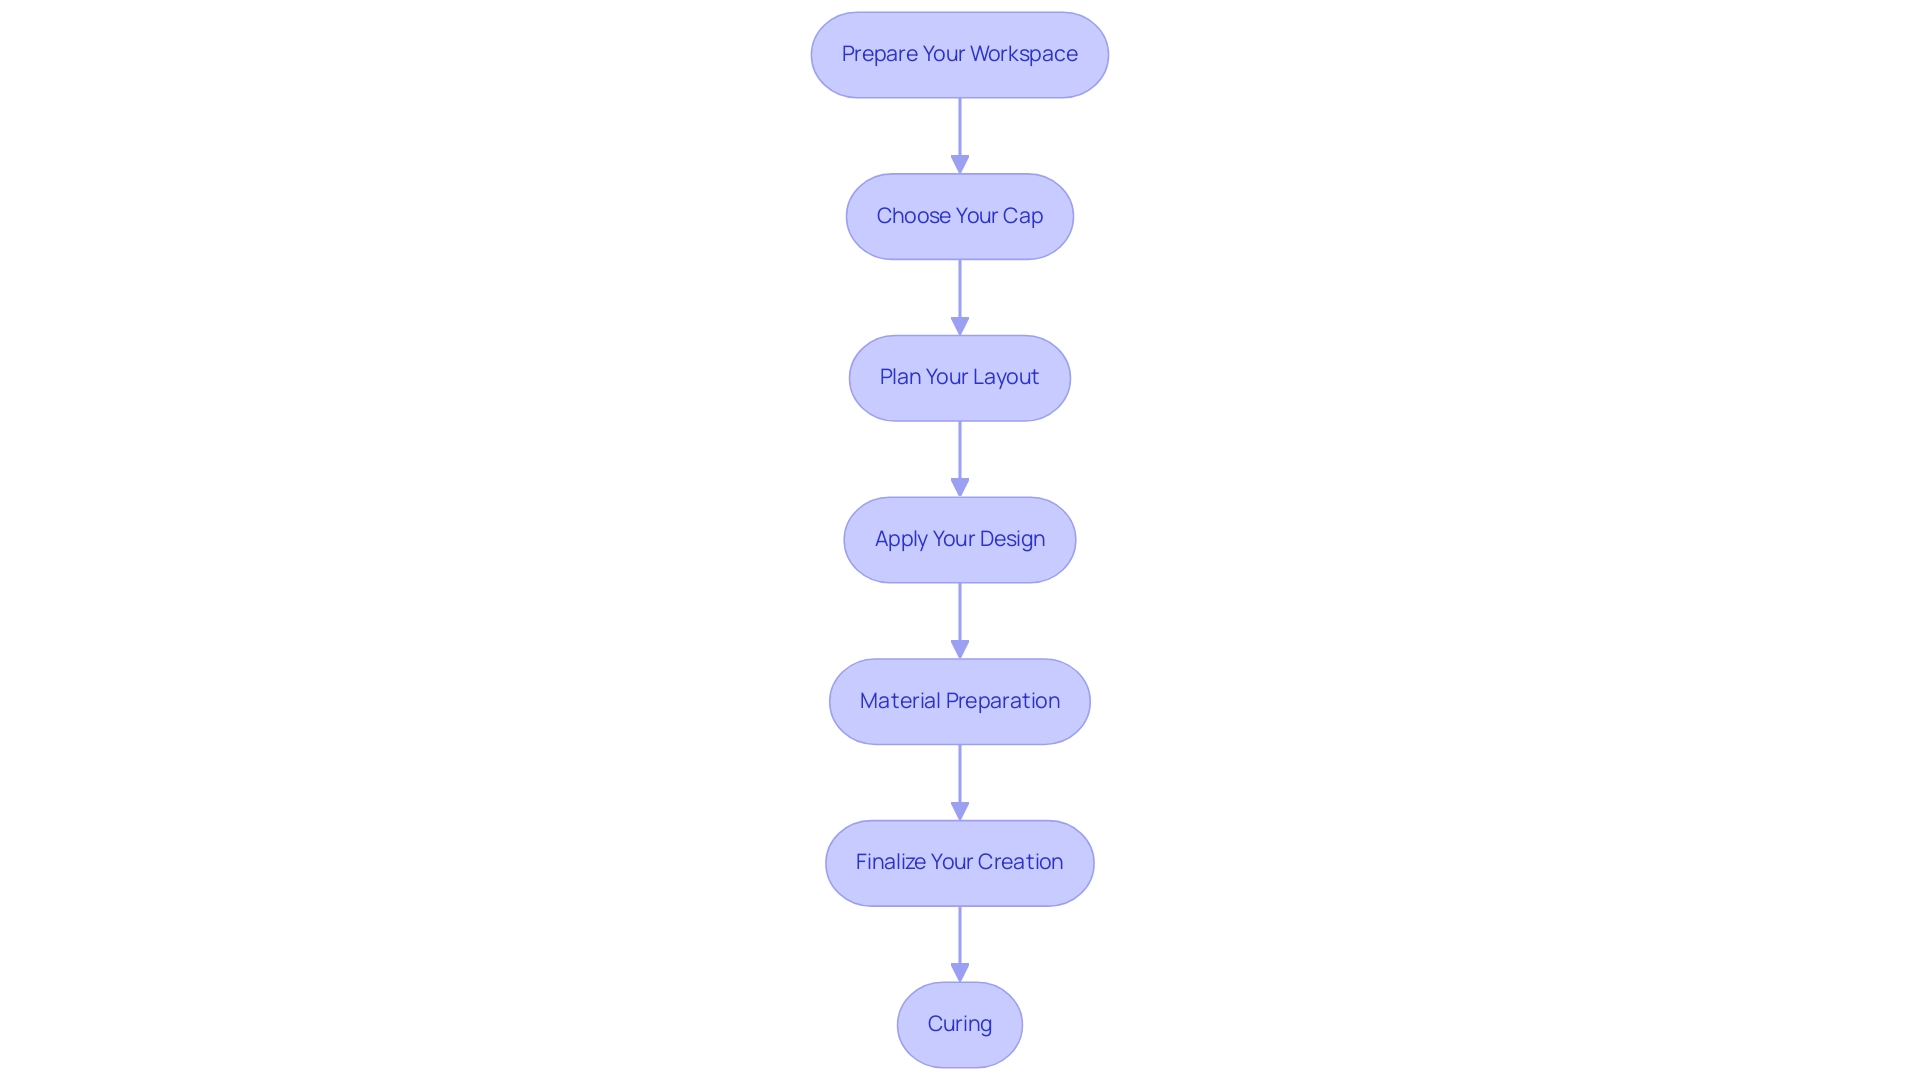
With your materials and concept ideas ready to go, let’s dive into the exciting process of creating your customized caps! Here’s a simple step-by-step guide that will help you unleash your creativity:
-
Prepare Your Workspace: Start by creating a clean and organized space where you can focus.
Good lighting is essential for those intricate details, so make sure your workspace is well-lit and comfortable. -
Choose Your Cap: Pick the blank cap that speaks to you and lay it flat on your workspace. This is your canvas, so select one that you’ll enjoy showcasing!
-
Plan Your Layout: Grab a pencil and lightly sketch your layout on the cap, or consider using a template if you’re planning to apply graphics. This planning phase is crucial for visualizing your masterpiece. Remember, the process starts with creating a digital creation using graphic software, which can be a logo, artwork, or any graphic you want to print.
-
Apply Your Design:
- For Painting: Utilize fabric paint to bring your design to life. Remember to allow each color to dry before adding another to avoid muddying the hues.
- For Heat Transfer Vinyl (HTV): Cut out your design from HTV, carefully weed out the excess, and position it on the cap. Iron it according to the manufacturer’s guidelines, making sure it adheres well.
-
For Patches: Whether you prefer sewing or ironing on patches, ensure they’re securely attached to enhance both durability and style.
-
Material Preparation: Before printing, ensure your substrate is ready. This involves cleaning the surface of the cap to ensure proper ink adhesion, allowing for a flawless finish. This step is crucial for achieving the best results when using UV printing.
-
Finalize Your Creation: After your creation is applied, take a moment to check for any areas that might need touch-ups. Adjust as necessary to ensure everything looks just right!
-
Curing: If you used fabric paint, let your creation cure for 24 hours before putting on or washing the cap. This step ensures your artwork remains vibrant and intact.
Incorporating the latest techniques for creating customized caps can enhance your customization process by allowing for more precise creations and applications. This reflects the ongoing evolution in the customization industry, which you can leverage to create standout designs.
Congratulations! You’ve just transformed a simple cap into a unique expression of your style.
Whether you wear it yourself or gift it to someone special, your custom creation is sure to turn heads!
Methods of Customization: Embroidery vs. Printing
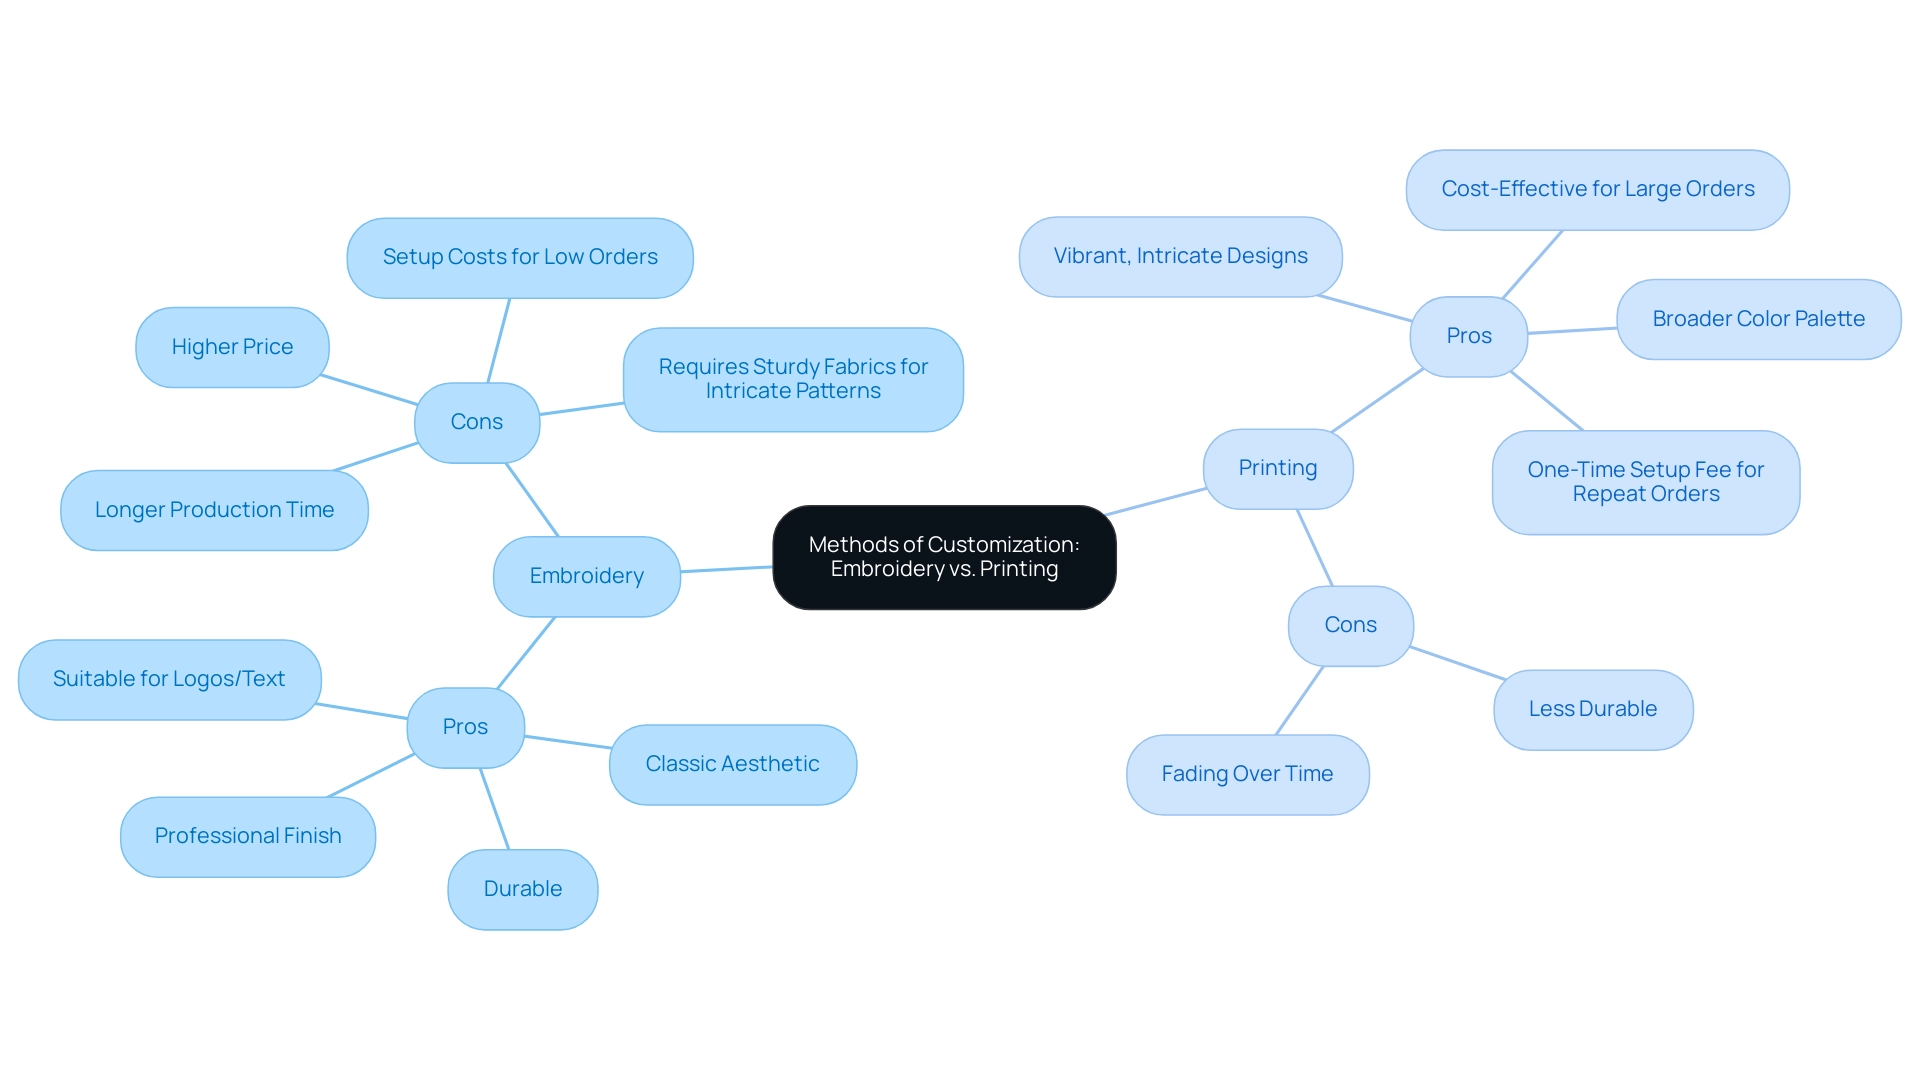
When it comes to customized caps, the two primary methods at your disposal are embroidery and printing, each offering distinct advantages and disadvantages. Let’s explore these options:
- Embroidery:
- Pros:
- Embroidery is synonymous with a classic aesthetic, delivering a high-quality finish that exudes professionalism.
- Its durability is a significant advantage, as embroidered patterns can withstand frequent washing and wear, making them a long-lasting choice for any cap.
- Experts often highlight its suitability for logos or text, providing a timeless look that appeals to many brands.
- However, for intricate patterns, it is essential to choose sturdy, non-stretch fabrics; intricate patterns require more resources, leading to higher costs.
-
Cons:
- However, embroidery can come with a higher price tag and may require more time to produce, especially for intricate patterns.
- The setup costs can also be a consideration if you're not anticipating repeat orders, as they can add to the overall expense.
-
Printing:
- Pros:
- On the flip side, printing opens the door to vibrant, intricate designs that can truly make a cap stand out.
- It’s a fantastic option for detailed graphics and allows for a broader color palette.
- Moreover, for larger orders, the cost-effectiveness of printing shines through, with savings of about $4-6 per item compared to embroidery.
- The setup fee is generally a one-time cost, which can be particularly beneficial for businesses expecting repeat orders.
- As one expert noted, "Browse our ideas for an Etsy shop and start your own online business. From vintage items to jewelry supplies, there are plenty of niches for new Etsy sellers."
- Cons:
- That said, printed patterns may face challenges over time, such as fading, and they tend to be less durable compared to their embroidered counterparts.
Choosing between these methods ultimately hinges on your design vision and the intended use of the customized caps. If you’re after a long-lasting, professional appearance, embroidery is the way to go. Conversely, if your focus is on vibrant colors and intricate details, printing could be your ideal option.
Keeping these factors in mind will help you create a cap that not only looks great but also meets your needs.
Tips for Ensuring Quality and Durability in Your Custom Caps
To ensure your personalized hats stand out in terms of quality and durability, consider these essential tips:
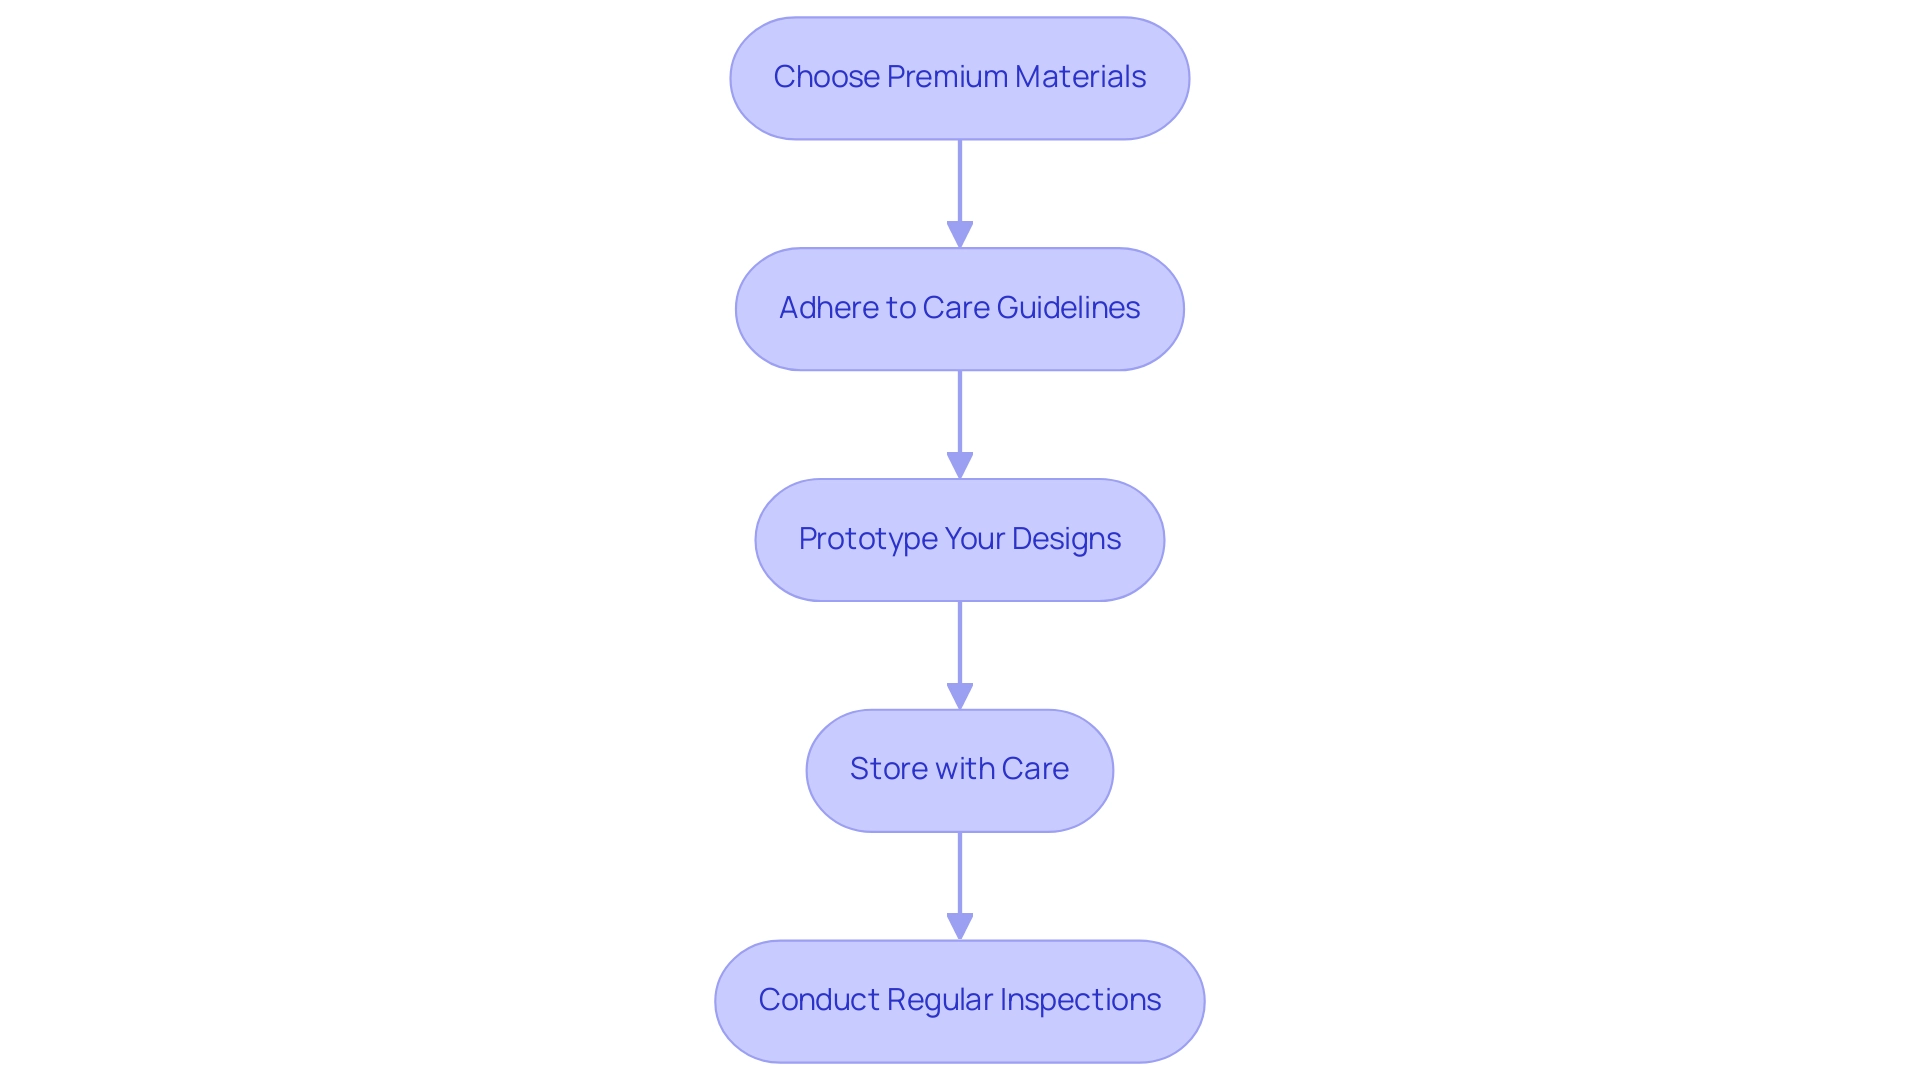
- Choose Premium Materials: Opt for high-quality fabrics and threads when selecting your headgear for painting or embroidery. The right materials not only enhance the cap's appearance but also contribute significantly to its longevity.
- Adhere to Care Guidelines: Once your hats are customized, it’s crucial to follow the provided care instructions meticulously. Proper washing and maintenance can prevent premature wear and keep your hats looking their best. As Benjamin H. Han emphasizes, 'Quality care is essential for maintaining the value of custom products.'
- Prototype Your Designs: Before committing your designs to the cap, test them on a scrap piece of fabric. This step ensures that the colors and techniques translate well, allowing for adjustments as necessary.
- Store with Care: When your kids are not in use, store them in a cool, dry environment. This practice helps to prevent fading and protects them from moisture damage that can compromise their integrity.
- Conduct Regular Inspections: Make it a habit to check your covers frequently for signs of wear. Early detection of issues enables prompt repairs, ensuring your customized caps appear fresh and vibrant.
In light of recent findings showing a 19.7% increase in the time taken by commercial payers to process hospital claims, the importance of maintaining high-quality products cannot be overstated. Moreover, case studies on quality assurance in customized caps production reveal that brands that prioritize material quality and care instructions see significantly lower rates of product returns and customer dissatisfaction.
By implementing these best practices, you'll not only create stunning customized caps but also ensure they last, making them perfect gifts or personal accessories that you can wear with pride.
Conclusion
Customizing caps is not just about creating a unique accessory; it’s a journey of self-expression and creativity that empowers individuals to showcase their personal style. With the right materials and tools, such as fabric paints, embroidered patches, and heat transfer vinyl, anyone can embark on this exciting project. Exploring various design options—from graphics and patterns to personalized text—opens up a world of possibilities that resonate with personal tastes and current trends.
The process of customization, whether through embroidery or printing, allows for a tailored approach to cap design. Each method offers its own set of advantages, catering to different aesthetic preferences and practical needs. By understanding these techniques, along with the importance of quality materials and proper care, the longevity and impact of custom caps can be greatly enhanced.
Ultimately, the vibrant world of custom headwear invites everyone to unleash their creativity and make a statement. Whether it’s for personal use, a gift for someone special, or a promotional item for a brand, customized caps serve as a canvas for individuality. Embracing this creative process not only results in standout accessories but also fosters a deeper connection to one’s personal style and values. So, gather those materials, let the imagination flow, and create a cap that truly reflects who you are!


